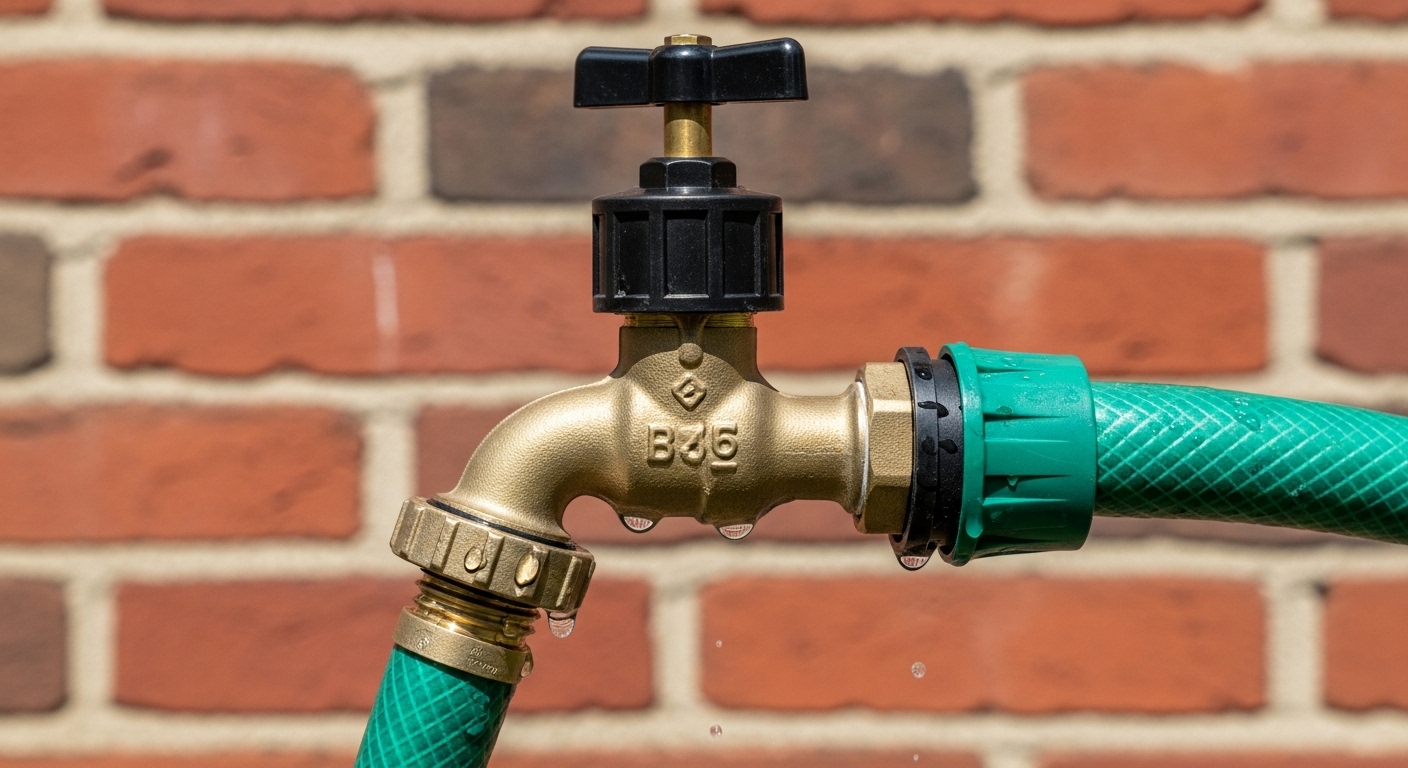
If your hose bib sprays from the top, whistles, or drips only when the water runs, an outdoor faucet vacuum breaker replacement is almost always the fix — and it’s one of the easiest, cheapest repairs in the entire plumbing world. The vacuum breaker (also called an anti-siphon valve) is that small dome or cap on top of newer outdoor faucets. It’s a code-required backflow preventer that stops dirty hose water from being siphoned back into your drinking water. When the tiny rubber diaphragm or spring inside wears out, it leaks. Below is exactly how to identify the right replacement part, remove the old one, and install a new one that actually seals — plus when a simple cap swap won’t cut it and you need to replace the whole assembly.
What Exactly Is a Vacuum Breaker on an Outdoor Faucet?
A vacuum breaker is a one-way backflow preventer built into the top of most outdoor faucets sold after the mid-1990s. It lets water flow out but slams shut the instant water pressure drops, so contaminated water — say, from a hose sitting in a pool of fertilizer or a bucket of soapy water — can’t get siphoned back into your home’s supply.
There are two common styles, and knowing which you have determines your replacement path:
- Integral hose-thread vacuum breaker (screw-on type): A small cap that threads onto the ¾” garden-hose spout, held by a set screw or a break-off screw. This is the kind you can usually replace by itself for a few dollars.
- Built-in atmospheric vacuum breaker (part of the sillcock body): Common on frost-free sillcocks, the breaker is a bonnet on top of the faucet body with an internal diaphragm and float. You replace a repair kit or the whole cap assembly, not just a screw-on cap.
Both do the same job. The screw-on style is what people usually mean when they ask about a quick swap. If you’re dealing with a leaking frost-free faucet body itself rather than the breaker on top, that’s a different repair — closer to what we cover in our guide on diagnosing a leaking faucet valve and choosing the right replacement.
How Do I Know If My Vacuum Breaker Is Bad and Needs Replacing?
Your vacuum breaker is bad if water sprays or dribbles out of the top cap while the faucet is running — that’s the telltale symptom. A healthy breaker stays dry on top; a failed one leaks from the vent holes because the internal diaphragm no longer seals under pressure.
Run through this quick diagnostic before you buy a part:
- Turn the faucet on and watch the top. Water squirting or misting from the cap vents = worn diaphragm. Replace the breaker.
- Listen for a hiss, whistle, or chatter. Air being pulled through a stuck breaker often whistles. That’s a sign the poppet is stuck or the spring is fatigued.
- Check whether it only leaks with a hose attached. Back-pressure from a hose can push a marginal breaker over the edge. If it seals with no hose but leaks with one, the breaker is on its way out.
- Look for cracks or a missing cap. UV and freeze cycles crack plastic breakers. A cracked body won’t hold a seal no matter how tight you make it.
If the faucet leaks from the handle or the wall side of the spigot instead of the top, the breaker isn’t your problem — you’re looking at a worn stem washer or a split frost-free tube.
What Size and Type Vacuum Breaker Do I Need to Buy?
For most homes, you need a ¾” garden-hose-thread (GHT) anti-siphon vacuum breaker — that’s the standard outdoor spout size in the U.S. If your faucet body has a threaded bonnet instead of a spout-mounted cap, buy the manufacturer-specific repair cap or kit that matches your brand (Woodford, Prier, Arrowhead, Mansfield are the big ones).
The single most common mistake is buying the wrong thread type. Garden-hose thread (¾” GHT / 11.5 TPI) is not the same as ¾” NPT pipe thread — they won’t seal together. When in doubt, measure the outside diameter of the spout threads (about 1 1/16″ across for standard GHT) and count that it accepts a normal garden hose.
| Type | Where It Sits | Typical Price | Best For | DIY Difficulty |
|---|---|---|---|---|
| Screw-on hose-thread breaker (½” or ¾” GHT) | Threads onto the spout end | $8–$15 | Standard hose bibs; universal fit | Very easy (5 min) |
| Set-screw anti-siphon breaker | Spout, locked by a break-off screw | $10–$18 | Code areas requiring a tamper screw | Easy (10 min) |
| Frost-free bonnet cap / repair kit | Top of the sillcock body | $12–$25 | Frost-free sillcocks (Woodford, Prier, etc.) | Moderate (15 min) |
| Full frost-free sillcock replacement | Whole faucet through the wall | $30–$70 | Cracked body or seized threads | Advanced (1–2 hr) |
Match brand to brand where you can. A Woodford Model 22 uses a specific vacuum breaker repair kit; a Prier C-144 uses its own. Bringing the old cap to the store — or photographing the brand stamp on the faucet body — saves you a second trip. This is the same “measure before you buy” logic we stress in our explainer on why exact faucet thread and hole sizes matter for installation.
How Do You Replace a Screw-On Outdoor Faucet Vacuum Breaker Step by Step?
To replace a screw-on outdoor faucet vacuum breaker, shut the water, back out the set screw, unthread the old breaker, wrap the spout in Teflon tape if needed, thread on the new breaker, and snug it. Here’s the full sequence with the details that actually matter.
- Shut off the water and relieve pressure. For a standard hose bib, turn off the indoor shutoff feeding that line, then open the outdoor faucet to drain it. On a frost-free unit you can often work with the faucet closed, but relieving pressure first keeps you dry.
- Remove the hose and any splitter. Get a clear view of the breaker cap on top of or at the end of the spout.
- Loosen the set screw. Many code-compliant breakers use a brass “break-off” screw designed to snap so it can’t be removed — if yours has a normal screw head, back it out with a screwdriver. If it’s a snapped-off tamper screw, you’ll usually break the plastic cap off with pliers (you’re replacing it anyway).
- Unthread the old breaker. Turn it counterclockwise by hand or with slip-joint pliers wrapped in a rag to avoid scratching the finish. Old ones can be crusty with mineral buildup; a squirt of penetrating oil and a few minutes’ wait helps.
- Clean the spout threads. Wipe off old tape, grit, and mineral scale so the new washer seats flat.
- Check the washer and wrap if needed. The new breaker has an internal rubber washer that does the sealing, so you usually don’t need tape on hose threads. If the new unit uses pipe threads, wrap 2–3 turns of PTFE (Teflon) tape clockwise.
- Thread on the new breaker. Hand-tighten clockwise until snug, then a quarter turn more with pliers — do not crank it, plastic bodies crack.
- Set the tamper screw (if required by code). Tighten the break-off screw until the head snaps off, locking the breaker in place.
- Restore water and test. Turn the supply back on, run the faucet, and watch the top. No spray from the vents and a clean stream from the spout means you’re done.
Do I Need Teflon Tape, and Why Does Mine Still Leak After Replacing It?
If your new breaker still leaks after replacement, 90% of the time it’s one of three things: cross-threaded installation, a missing or pinched internal washer, or the wrong thread type. Teflon tape is only part of the answer.
Here’s the breakdown of why a “new” part keeps leaking:
- Cross-threading. Starting the breaker crooked chews the threads and leaves a gap. Always start it by hand and back off if it feels gritty, then re-seat.
- Skipping — or over-relying on — tape. On hose threads the rubber washer seals, not the tape. On pipe threads you do need tape. Using tape where the washer should seal can actually hold the washer off its seat.
- Leaking from the vents, not the joint. If water comes from the top vent holes rather than the base, the breaker itself is defective or you got the wrong style — swap it for a fresh one.
- Mineral debris under the washer. Even one grain of grit keeps the seal open. Clean the spout face before install.
- Wrong thread standard. GHT into NPT (or vice versa) will never seal. Confirm both sides are garden-hose thread.
If you’ve re-seated it, confirmed the thread type, and it still weeps from the vents, the replacement unit is faulty — not unusual with the cheapest big-box breakers. Step up to a solid-brass model rather than a thin plastic one; they cost a couple dollars more and last years longer. The same “buy the quality part once” reasoning applies to any repair part, which is why we push people toward genuine components in guides like our look at which faucet repair parts actually fail and where to get genuine replacements.
When Should I Replace the Whole Outdoor Faucet Instead of Just the Vacuum Breaker?
Replace the whole outdoor faucet instead of just the breaker when the faucet body is cracked from a freeze, the handle side leaks, the spout threads are stripped, or a frost-free sillcock leaks inside the wall. A vacuum breaker swap only fixes leaks at the top of the spigot.
Warning signs that point to a full replacement rather than a breaker:
- Water leaks from the wall or behind the faucet when it’s on — a split frost-free tube from a hard freeze. Replace the sillcock.
- The handle drips constantly even after tightening — worn stem/packing; sometimes a repair kit fixes it, sometimes the body is done.
- Stripped or corroded spout threads that won’t hold any breaker or hose fitting.
- You’re upgrading to a push-to-connect or modern frost-free unit. If you’re already opening things up, it’s worth pricing a full swap — our commercial buyer’s guide to SharkBite push-to-connect hose bibs and sillcocks walks through choosing a replacement faucet and connecting it without soldering.
For a straightforward breaker leak, though, don’t overspend. A $12 breaker fixes a $12 problem. Save the full sillcock replacement for when the body itself has failed.
How Long Does a Vacuum Breaker Last, and How Do I Make the New One Last Longer?
A quality brass vacuum breaker lasts 8–15 years; cheap plastic ones often fail in 2–5, especially in freezing climates or hard-water regions. You extend its life mainly by protecting it from freeze damage and mineral scale.
Practical longevity tips:
- Disconnect hoses before winter. A hose left attached traps water in the breaker and spout, which freezes, expands, and cracks the body — the #1 killer of both breakers and frost-free faucets.
- Choose brass over plastic where budget allows. Brass shrugs off UV and freeze-thaw far better.
- Flush hard-water scale. In mineral-heavy areas, unthreading and rinsing the breaker once a year keeps the diaphragm moving. Hard water is the same culprit behind clogged aerators and filters, as we cover in our guide on dealing with hard water and old pipes.
- Don’t over-tighten. Crushing the plastic threads or washer causes slow leaks and early failure. Snug plus a quarter turn is enough.
FAQ
Can I remove the vacuum breaker from my outdoor faucet completely?
You can physically unthread a screw-on breaker, but you shouldn’t remove it permanently. Anti-siphon backflow prevention is required by plumbing code in most U.S. jurisdictions to protect your drinking water. Removing it can allow contaminated hose water to siphon back into your supply. Replace a bad breaker rather than eliminating it. If yours restricts flow too much, buy a higher-flow brass model instead.
Why does my outdoor faucet only leak from the top when the water is on?
That’s the classic sign of a failed vacuum breaker diaphragm. Water escaping from the vent holes on top of the cap while the faucet runs means the internal seal no longer holds pressure. It’s not the faucet body — it’s the breaker, and a $10–$15 replacement almost always fixes it.
Do all outdoor faucets have a vacuum breaker?
No. Faucets installed before the mid-1990s often don’t have one, and some older hose bibs never did. If yours lacks one, you can add a screw-on hose-thread vacuum breaker to the spout for a few dollars to meet current code and protect your water. Newer frost-free sillcocks almost always have a built-in breaker on top of the body.
Is a vacuum breaker the same as an anti-siphon valve?
Yes — for outdoor faucets the terms are used interchangeably. “Atmospheric vacuum breaker” (AVB) and “anti-siphon device” both describe the backflow preventer on top of the spigot. When shopping, searching either term will bring up the correct part; just match the thread size and style.
Can I replace an outdoor faucet vacuum breaker without any plumbing experience?
For the screw-on type, yes — it’s genuinely a beginner job needing only pliers and maybe a screwdriver, done in 10–15 minutes with the water off. A built-in frost-free bonnet kit is slightly more involved but still DIY-friendly. Only a cracked faucet body or an in-wall leak calls for more advanced skills or a plumber.
What’s the difference between a ½” and ¾” vacuum breaker?
The number refers to the thread size. Standard U.S. garden-hose spouts are ¾” GHT, so most replacement breakers are ¾”. Some compact or utility faucets use ½”. Measure your spout or bring the old part to the store — a ¾” breaker won’t seal on a ½” spout and vice versa.
Author note: This guide was written by the Avamani fixtures team, drawing on hands-on installation and repair of residential and light-commercial hose bibs, sillcocks, and backflow devices. We’ve swapped enough leaking breakers to know that the fix is usually simpler — and cheaper — than homeowners fear.
About Avamani: Avamani specializes in faucets and bathroom fixtures, from kitchen and bath faucets to outdoor spigots and repair parts. We test fitment and flow against ASME A112.18.1 / CSA B125.1 faucet standards and reference ASSE 1011 for hose-connection vacuum breakers, and we back qualifying fixtures and parts with manufacturer warranty support so you can buy the right replacement with confidence.