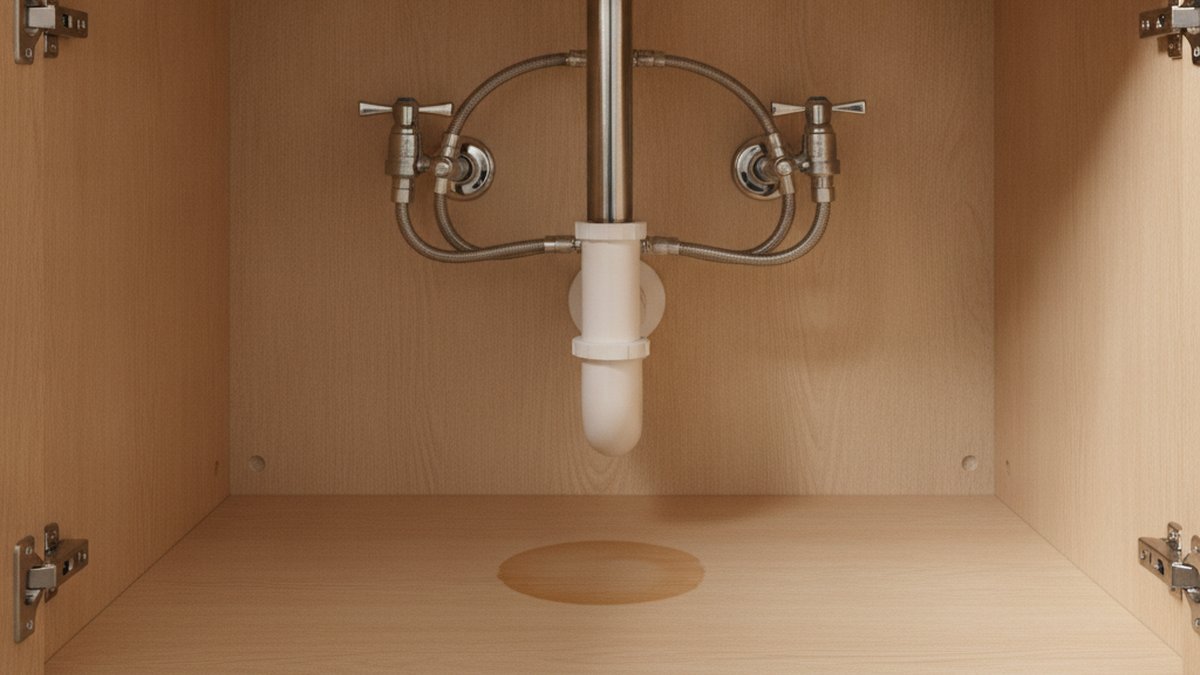
Learning how to fix a leaky faucet under the bathroom sink is one of the most useful, money-saving repairs a homeowner can do — and it’s far less intimidating than it looks when you’re staring up into a dark cabinet at a puddle. The trick is that “leak under the sink” isn’t one problem; it’s four or five very different problems that happen to end up in the same wet cabinet. Once you know how to tell them apart, the actual fix is usually simple, cheap, and quick.
At Avamani we sell and service bathroom faucets every day, and the leaks people describe over the phone almost always trace back to a short list of usual suspects. Below, we’ll walk through exactly how to find which one you have, fix it, and know when it’s genuinely time to stop and call a pro.
Where Is the Water Actually Coming From Under My Bathroom Sink?
Start here, because guessing wastes parts and time. A leak under the bathroom sink almost always originates in one of five spots: the supply-line connections, the shut-off (angle stop) valves, the faucet tailpiece nuts, the drain body/flange, or the P-trap and its slip-joint nuts. Water travels and drips off the lowest point, so where you see the puddle is rarely where the leak starts.
Here’s the reliable way to find it. Wipe every fitting bone-dry with a paper towel. Then lay dry toilet paper or a folded paper towel under each connection. Turn the water on, fill the bowl, and let it drain. Within a minute or two, the paper that gets wet tells you the source — no more guessing.
- Wet only when water runs, high up near the faucet: supply line or tailpiece nut.
- Wet at the little oval valves on the wall: angle stop packing nut or valve body.
- Wet only when the sink drains, lower down: drain flange or P-trap slip nuts.
- Constant slow drip even with the faucet off: pressurized supply side — fix this first, it never stops on its own.
This five-minute diagnosis is the single most important step. Everything after it is easy.
How Do I Turn Off the Water Before I Start?
Reach under the sink and turn both oval or football-shaped valves (the angle stops) clockwise until they stop — righty-tighty. There are usually two: hot on the left, cold on the right. Then open the faucet on top to release pressure and confirm the water actually stopped. If it keeps flowing, the valves are worn and you’ll shut off the home’s main instead.
A quick warning that saves a lot of grief: old angle stops that haven’t been turned in ten years can seize or start weeping from the stem when you finally move them. Turn them gently. If a valve won’t budge or starts dripping from the packing nut after you touch it, don’t force it — snug the packing nut a small amount with a wrench, and if that fails, that valve itself is now the repair.
How Do You Fix a Leaky Supply Line Connection (the Most Common Cause)?
The most common under-sink leak is a loose or worn supply-line connection, and the fix is usually just a careful quarter-turn with a wrench — or a $6 new braided line. The supply lines are the flexible hoses running from the angle stop valves up to the faucet’s inlet shanks. They leak at either end: the nut at the valve, or the nut at the faucet.
First, try tightening. With the water still off, hold the valve steady with one wrench and snug the connection nut with another — about a quarter-turn past hand-tight. Do not crank it hard; over-tightening crushes the rubber washer inside and makes the leak worse. Turn the water back on and check your dry paper towel.
If it still weeps, replace the line. Braided stainless steel supply lines are cheap and dramatically more reliable than old-style vinyl or rigid chrome risers. Measure the length and note the connection sizes (the faucet end is usually 1/2″ or a specialty compression fitting; the valve end is typically 3/8″ compression). When you install the new one, hand-tighten first, then add just a quarter- to half-turn with the wrench.
If the drip is coming from the threaded inlet where the line meets the faucet body itself, the culprit may be a hardened rubber gasket or worn washer inside the faucet’s mounting hardware. That’s a good moment to understand what’s actually inside your faucet — our guide to the essential brass faucet parts breaks down each component so you know exactly which washer or cartridge you’re replacing.
What If the Faucet Itself Is Leaking Down Into the Cabinet?
If water only appears under the sink when the faucet is running — and it’s dripping straight down the tailpiece or from the base — the leak is inside the faucet, and the fix is almost always a worn cartridge, O-ring, or compression washer. Water runs down the inside of the faucet body and drips off the lowest point under the counter, which fools people into thinking it’s a plumbing-connection problem.
The repair depends on your faucet type:
| Faucet type | How to spot it | Usual leak cause | Typical fix & cost |
|---|---|---|---|
| Compression (two handles, tighten to stop) | Handles keep turning & get “tight” | Worn rubber seat washer / O-ring | Replace washer — $2–$5 |
| Cartridge (single or double handle, smooth motion) | Handle moves smoothly, no “tightening” | Cracked cartridge or O-rings | New cartridge — $10–$40 |
| Ball type (single handle, wobbly) | Domed cap, one lever | Worn springs/seats or ball | Repair kit — $15–$25 |
| Ceramic disc (single lever, premium) | Wide cylindrical body | Failed seals or cracked disc | Seal kit or disc — $15–$50 |
For any of these, shut off the water, plug the drain so you don’t lose small parts, pull the handle and cartridge/stem, and take the old part to the store (or match the model number) to get the exact replacement. Lubricate new O-rings with plumber’s silicone grease before reassembly. If your faucet also nags you with weak flow or a rattle, those often share the same worn internals — we cover related symptoms in our walkthrough on fixing low water pressure and cartridge issues, and the diagnostic approach carries straight over to bathroom faucets.
How Do I Fix a Leak From the P-Trap or Drain (Only Leaks When Draining)?
If the cabinet only gets wet after you fill and drain the basin — not while the faucet runs — the leak is on the drain side: the P-trap slip nuts or the drain flange, not the pressurized water supply. This is good news, because drain leaks aren’t under pressure and are among the easiest fixes.
Work through these in order:
- Hand-tighten the slip nuts. The plastic P-trap nuts should be snug by hand only — over-wrenching cracks them. If a nut is loose, snug it and re-test.
- Check the washers. Inside each slip joint is a nylon or rubber beveled washer. If it’s flattened, cracked, or misaligned, replace it (a whole trap kit is about $8) and make sure the beveled edge faces into the joint.
- Inspect the trap for cracks. Old chrome traps corrode from the inside. If the metal is thin or crumbly, swap the trap for a modern PVC one.
- Suspect the drain flange if water tracks down the tailpiece from the very top. That means the plumber’s putty or gasket under the sink drain has failed and the drain assembly needs to be re-sealed.
When you reassemble, make sure the trap arm slopes slightly downward toward the wall and everything lines up without forcing — cross-threaded slip nuts are a leading cause of “I fixed it and it still leaks.”
Leaky Angle Stop Valve: Fix It or Replace It?
If the leak is at the shut-off valve on the wall, first try snugging the packing nut (the nut just behind the handle) a quarter-turn; if it still weeps from the stem or body, replace the valve — a $10 part. A valve that drips only from the stem when opened usually just needs the packing nut tightened. A valve that leaks around its body, or won’t shut off at all, is done.
Replacing an angle stop means shutting off the home’s main water supply, so it’s a slightly bigger job — but modern push-to-connect (quarter-turn) valves make it very DIY-friendly with no soldering. If you’re at all unsure about the pipe stub-out (copper vs. PEX vs. galvanized), that’s a fair point to bring in a plumber, because a mistake here can flood the cabinet.
What Tools and Parts Should I Have Ready?
You can handle 90% of under-sink faucet leaks with a small, inexpensive kit. Gather these before you start so you’re not crawling back out of the cabinet mid-repair:
- Two adjustable wrenches (one to brace, one to turn) and/or channel-lock pliers
- A basin wrench for the hard-to-reach faucet inlet nuts
- Replacement braided supply lines, a P-trap washer kit, and O-rings/cartridge for your model
- Plumber’s silicone grease and plumber’s putty (or a rubber drain gasket)
- Old towels, a headlamp or flashlight, and a small bucket for trap water
- Painter’s tape to label hot/cold lines if you disconnect them
Buying quality replacement parts matters more than people expect. A brass compression stem or a well-made cartridge will outlast a bargain-bin plastic one by years, and a good braided supply line is cheap insurance against a 2 a.m. burst.
When Should I Stop and Call a Plumber?
Call a professional if the leak is inside the wall, if the angle stop valves won’t shut off the water at all, if you see galvanized or corroded pipes crumbling, or if you’ve replaced the obvious parts and it still leaks. These signal a problem beyond a simple washer swap — and continued water in the cabinet risks warped particleboard, mold, and a much bigger bill later.
Also stop if you smell a persistent sewer odor even after tightening the trap, or if the sink drains slowly and leaks — that combination can point to a venting or blockage issue downstream that no amount of tightening will fix. There’s no shame in it; knowing the line between a $6 washer and a $600 pipe repair is its own kind of expertise.
FAQ
Why does my bathroom sink only leak when I run the water?
Because the leak is on the pressurized supply side — a supply-line nut, a faucet O-ring, or a worn cartridge — and water only moves through those parts when the faucet is open. Dry everything, run the water, and watch the top of the faucet body and the supply connections to pinpoint it.
Can I fix a leaky faucet under the bathroom sink without turning off the main water?
Usually yes — you just close the two angle stop valves under that sink, which isolates it while the rest of the house keeps water. You only need the main shut-off if those local valves are broken or you’re replacing the valves themselves.
How much does it cost to fix a leak under a bathroom sink myself?
Most DIY fixes run $2 to $40 in parts: a compression washer is a couple of dollars, a braided supply line is around $6, a P-trap kit is about $8, and a cartridge is $10–$40. A plumber for the same job typically charges $150–$350, so the savings are real.
Is it a supply leak or a drain leak — how do I tell fast?
Timing tells you. If the cabinet gets wet while the faucet is running, it’s the supply side (pressurized). If it only gets wet while the basin drains, it’s the drain side — the P-trap or drain flange. This single observation saves you from replacing the wrong parts.
Why is my faucet still leaking after I replaced the washer or cartridge?
Most often the replacement part is the wrong size, an O-ring got pinched or wasn’t greased, or the valve seat inside the faucet is corroded and needs resurfacing or replacing. Double-check the part number against your exact model, and inspect the seat the stem presses against.
Can over-tightening actually cause a leak?
Yes — this is one of the most common DIY mistakes. Cranking a compression nut or a plastic slip nut too hard crushes or deforms the rubber/nylon washer inside, distorts the seal, and can crack plastic fittings. Hand-tight plus a quarter- to half-turn is almost always enough.
The Bottom Line
Fixing a leaky faucet under the bathroom sink comes down to three moves: isolate the water, find the exact source with the dry-paper-towel trick, then tighten or swap one cheap part. The overwhelming majority of these leaks are a loose supply nut, a worn washer or cartridge, or a P-trap gasket — all fixable in under 30 minutes with basic tools. Save the plumber for in-wall leaks, dead shut-off valves, or corroded pipe.
About the author: This guide was written by Avamani’s fixture repair team, drawing on years of hands-on faucet installation and warranty service. About Avamani: Avamani (avamani.com) is a specialist retailer of bathroom and kitchen faucets, sinks, and fixtures. Every faucet and repair part we sell is selected against the finishes and durability standards we’d install in our own homes, and our supply lines and cartridges are chosen to meet standard NSF/ANSI plumbing and lead-free (NSF/ANSI 372) requirements. Faucets purchased through Avamani carry the manufacturer’s warranty, and our support team can help you match the exact cartridge, washer, or valve for your model so your repair holds the first time.