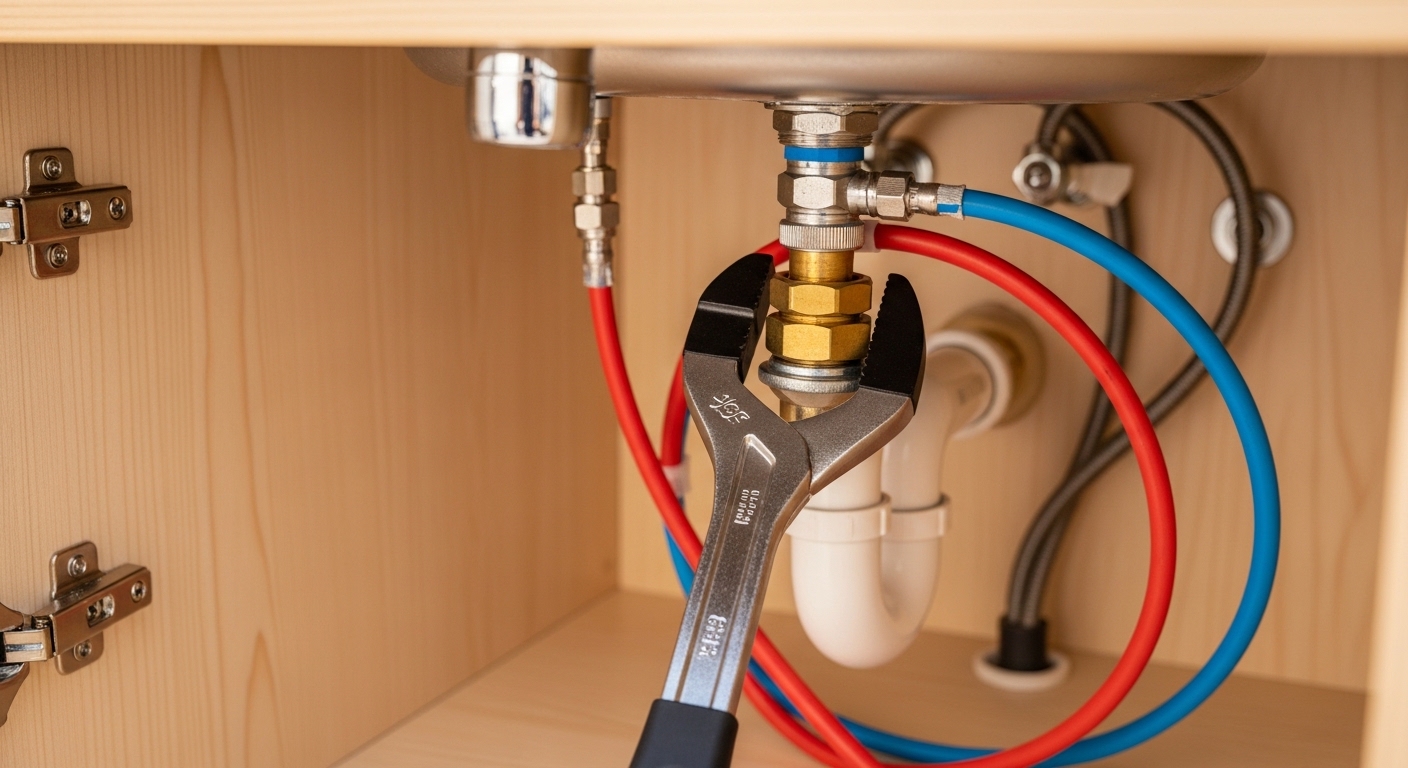
If you’ve been wondering exactly how to replace kitchen faucet in an rv setups without paying a mobile RV tech $120 an hour, the honest answer is that it’s one of the easiest upgrades you can make to a camper. RV plumbing looks intimidating because everything is crammed under a tiny sink, but the connections are actually simpler than a house because RVs use flexible lines and quick fittings instead of rigid copper. If you can reach behind the sink and turn a wrench a quarter-turn at a time, you can do this yourself in about an hour.
Below I’ll walk through the whole job the way I’d explain it to a friend at the campsite: what makes RV faucets different, the exact tools, the step-by-step, the mistakes that cause leaks, and how to pick a replacement that actually fits a motorhome, travel trailer, or fifth wheel.
Why is an RV kitchen faucet different from a regular house faucet?
An RV faucet is different mainly because of the connections and the materials, not the shape. Most RV kitchen faucets connect with ½” flexible lines that terminate in a female ½” NPT thread or a quick-connect fitting, and they’re often made lighter (plastic-bodied or thin-wall metal) to save weight and survive freezing.
Here’s what actually matters when you’re swapping one:
- Hole spacing: RV kitchen sinks almost always use a 4-inch centerset (two outer holes 4″ apart) or a single-hole layout. Most residential “8-inch widespread” faucets will not fit an RV sink deck.
- Supply connections: RVs run on flexible PEX or braided lines, not rigid ½” copper stub-outs with compression valves. There are usually no shut-off valves under the sink — the pump and city-water inlet are your shut-offs.
- Water pressure: RV systems run lower and more variable pressure (a 12V pump cycling on and off), so a cheap faucet cartridge that “chatters” in a house will chatter worse in a camper.
- Winterizing: RV faucets need to fully drain, which is why many come with a built-in low-point drain design and why frozen residential faucets crack.
Bottom line: you don’t need an RV-branded faucet, but you do need one that matches the hole configuration and can handle flex-line connections. Many people successfully install a standard residential centerset kitchen faucet — you just add the right adapters. If you’re unsure how deck holes and mounting hardware line up in general, our explainer on how to set up a kitchen faucet yourself covers the mounting mechanics that apply here too.
What tools and parts do I need to replace an RV kitchen faucet?
You need a basin wrench, channel-lock pliers, plumber’s tape, and possibly two ½” line adapters — that’s basically it. There’s no soldering, no glue, and no special RV certification required.
Here’s the full kit I’d lay out before starting:
- Basin wrench — the single most useful tool; it reaches the mounting nuts up behind the sink where pliers can’t.
- Channel-lock / tongue-and-groove pliers — for the supply-line connections.
- Adjustable wrench — backup for tight fittings.
- PTFE plumber’s tape (Teflon tape) — 3–4 wraps on any threaded connection.
- A small bucket and towel — the lines will dribble even after draining.
- Headlamp or flashlight — RV cabinets are dark caves.
- New faucet — matching your hole spacing (4″ centerset or single-hole).
- Adapters if needed — ½” female flex-line to ⅜” faucet shank, or ½” NPT couplers. Buy a couple of sizes; they’re a couple of dollars each.
Tip: measure your existing hole spacing before you buy the new faucet. Pop the old one loose enough to see whether it’s single-hole or 4″ centerset. Getting the sizing wrong is the #1 reason a replacement stalls. If you want to understand thread and hole sizing more deeply, the breakdown of the M6 tap hole size and why it matters for faucet installation is a good primer on how faucet shank dimensions translate to what fits your sink deck.
How do I turn off the water and drain the lines in an RV?
Turn off the 12V water pump switch, disconnect from city water, then open the kitchen faucet (hot and cold) to release pressure and let the lines drain into the sink. This is the step people skip — and then they get a face full of pressurized water under the cabinet.
Do it in this order:
- Switch off the water pump at the panel (usually a rocker switch labeled “Water Pump”).
- Disconnect the city water hose if you’re hooked up at a campground.
- Open the kitchen faucet fully, both handles/temperatures, until water stops flowing. This bleeds the pressure.
- Open a low-point drain or another faucet briefly to make sure the system isn’t holding pressure.
- Place your bucket and towel under the connections before you loosen anything.
Even after all that, expect a cup or two of water to spill when you crack the fittings. That’s normal — RV lines hold residual water in the loops. It won’t be pressurized, just messy.
What are the actual steps to replace the faucet?
The core job is: disconnect two supply lines, remove two mounting nuts, drop the old faucet, set the new one, reconnect. Here’s the detailed sequence.
- Disconnect the supply lines. Reach under the sink and unthread the hot and cold lines from the faucet shanks using channel-locks. Note which is hot (usually left) and cold (right). Take a phone photo before you disconnect — future you will thank you.
- Remove the mounting nuts. This is where the basin wrench earns its keep. The plastic or brass nuts that hold the faucet to the sink deck are up high and finger-tight to snug. Turn counter-clockwise from below.
- Lift the old faucet out. Once the nuts are off, the faucet lifts straight up out of the deck. If it’s stuck, it’s just old sealant — wiggle and pull.
- Clean the sink deck. Scrape off the old plumber’s putty or gasket residue so the new faucet seats flat and seals.
- Set the new faucet. Feed the new faucet’s shanks (and supply lines, if pre-attached) down through the holes. Use the included gasket or a bead of silicone under the base.
- Tighten the new mounting nuts from below with the basin wrench. Snug, not gorilla-tight — over-tightening cracks plastic sink decks common in RVs.
- Reconnect the supply lines, hot to hot, cold to cold. Wrap 3–4 turns of PTFE tape on threaded fittings. Use adapters if your line thread doesn’t match the faucet shank.
- Pressure-test. Turn the pump back on, let it build pressure and cycle off, and watch every connection for drips for a full 2–3 minutes. Run hot and cold. Check again after 10 minutes.
If your new faucet is a pull-down or pull-out sprayer style, there’s an extra hose and a weight to hang on the spray line — the same mechanism you’d deal with on any residential pull-out, like the one covered in our Grohe pull-out kitchen tap buyer’s guide. Route that hose so it doesn’t kink against the cabinet wall.
Can I use a regular residential faucet in my RV, or does it have to be RV-specific?
Yes, you can use a standard residential kitchen faucet in an RV as long as the hole spacing matches and you use adapters for the flexible supply lines — you are not locked into “RV faucet” branded products. Many RVers upgrade to a nicer residential faucet precisely because RV-branded ones tend to be flimsy plastic.
There are three real cautions:
- Weight and height: a tall, heavy residential faucet can be top-heavy on a thin RV sink deck and may hit an overhead cabinet or the slide when retracted. Measure your clearance.
- Freeze tolerance: residential metal faucets can crack if you don’t winterize properly. RVs freeze from all sides, not just one exposed wall.
- Connections: residential faucets usually come with ⅜” compression or hoses; you’ll adapt those to your ½” RV lines. Cheap brass adapters solve this for a few dollars.
Here’s a quick comparison to help you decide:
| Faucet Type | Fits RV Sink? | Freeze Risk | Typical Cost | Best For |
|---|---|---|---|---|
| RV-branded plastic faucet | Yes — direct fit | Low (drains well) | $25–$60 | Budget replacement, easiest swap |
| Residential centerset (4″) | Yes with adapters | Medium | $60–$180 | Upgrading look & durability |
| Residential single-hole pull-down | Sometimes — check clearance | Medium | $90–$250 | Modern look, deep sinks |
| 8″ widespread residential | Rarely — wrong spacing | Medium | $120–$300 | Not recommended for RVs |
For a broader sense of what quality feels like at each price tier, our roundup of the best kitchen faucet of 2025 for your sink, water, and budget compares cartridges, finishes, and spray heads that carry straight over to RV use — just filter for a 4″ centerset or single-hole model.
Why is my new RV faucet leaking after I installed it?
A new RV faucet almost always leaks for one of three reasons: a supply connection that needs more PTFE tape or a quarter-turn tighter, a missing or pinched gasket under the base, or a cross-threaded adapter. Fix the connection, not the whole faucet.
Diagnose it by location:
- Dripping at a supply-line fitting under the sink: re-tape the threads (3–4 wraps, clockwise) and snug a bit more. Don’t over-torque plastic.
- Water pooling on top of the sink deck around the base: your base gasket is misaligned or you skipped the silicone bead. Pull it, reseat, re-tighten.
- Drip from the spout or handle base: the cartridge isn’t seated, or a handle set-screw is loose — the same failure pattern we cover in why a kitchen faucet handle is loose and how to tighten it.
- Leak only when the pump runs: a fitting isn’t fully engaged; the pressure spikes reveal it. Tighten while pressurized (carefully) to find the weep point.
A properly installed RV faucet should hold pressure with zero visible moisture after 10 minutes. If you still see beading, it’s a connection — not a defect.
How long does it take and what does it cost to DIY versus hire out?
A DIY RV faucet replacement takes 30–60 minutes and costs only the price of the faucet ($25–$180) plus a few dollars in adapters and tape. A mobile RV tech typically charges $90–$150 in labor on top of the faucet, so doing it yourself saves you roughly $100–$150 every time.
The learning curve is almost entirely “getting comfortable reaching behind the sink.” Once you’ve done it once, the second time takes 20 minutes. The only scenario where hiring out makes sense is if your sink deck is cracked and needs replacement, or if the supply lines themselves are brittle and need to be re-run — that’s a bigger PEX job.
FAQ
Do I need to turn off the water pump AND the city water?
Yes — whichever source you’re using is what pressurizes the lines. Switch off the 12V pump at the panel and disconnect any city-water hose, then open the faucet to bleed remaining pressure. If you only kill one source and stay hooked to the other, the lines stay pressurized and you’ll get sprayed.
What size are RV kitchen faucet supply lines?
Most RV kitchen faucet supply lines are ½” PEX or ½” flexible lines, often terminating in a ½” female thread or a quick-connect fitting. Residential faucets usually come with ⅜” connections, so you’ll need inexpensive ½”-to-⅜” adapters. Always confirm by measuring your existing lines before buying.
Can I install a pull-down sprayer faucet in a small RV sink?
Often yes, but check two clearances first: the height under any overhead cabinet when the faucet is upright, and the depth of your sink so the sprayer weight and hose don’t bottom out. Single-hole pull-down faucets fit many RV sinks, but a very tall model may hit a cabinet or block a slide-out when retracted.
Will a residential faucet freeze and crack in my RV?
It can if you don’t winterize properly, because RV plumbing is exposed to cold from multiple sides. Blow out the lines or run RV antifreeze through the system before freezing weather, and leave the faucet open to drain. This applies to both RV-branded and residential faucets, but heavier metal residential bodies are less forgiving of trapped water.
How do I know if my RV sink is single-hole or a 4-inch centerset?
Loosen the old faucet enough to see how many holes are drilled in the sink deck and measure center-to-center between the outer holes. If the outer holes are 4 inches apart, it’s a centerset; if there’s just one hole (plus maybe a small sprayer/soap hole), it’s single-hole. Buy your replacement to match that exact layout — this is the single most important measurement in the whole job.
Do I need plumber’s putty or silicone under the new RV faucet?
Use the rubber gasket that comes with the faucet if it has one; if not, a thin bead of clear plumber’s silicone under the base seals against water sneaking onto the deck. Avoid old-school plumber’s putty on plastic RV sink decks, since some putties can stain or degrade lightweight materials over time.
A quick note on picking a faucet that lasts
Because RV pumps cycle on and off, the cartridge is where cheap faucets fail first — you’ll hear chatter or feel the handle get sloppy within a season. Look for a faucet with a ceramic-disc cartridge and a finish rated to a corrosion-resistance standard (ASME A112.18.1 / CSA B125.1 is the North American benchmark for kitchen faucets, and reputable brands test to it). A lead-free waterway compliant with NSF/ANSI 61 matters even more in an RV, where you’re often drinking from the same tap.
About the author & Avamani: This guide was written by the Avamani fixtures team, which has spent years testing kitchen and bath faucets across residential, utility, and RV installations — including hands-on swaps in travel trailers and fifth wheels. Avamani curates faucets that meet ASME/CSA performance standards and carry manufacturer warranties, so the model you install in a camper today is the same quality you’d trust in a home. We only recommend installation steps we’ve performed ourselves, and we favor ceramic-disc cartridges and lead-free waterways for the durability RV water systems demand. Always follow your specific faucet’s included instructions and your RV manufacturer’s plumbing guidance, and keep your warranty paperwork in case a cartridge needs a free replacement down the line.