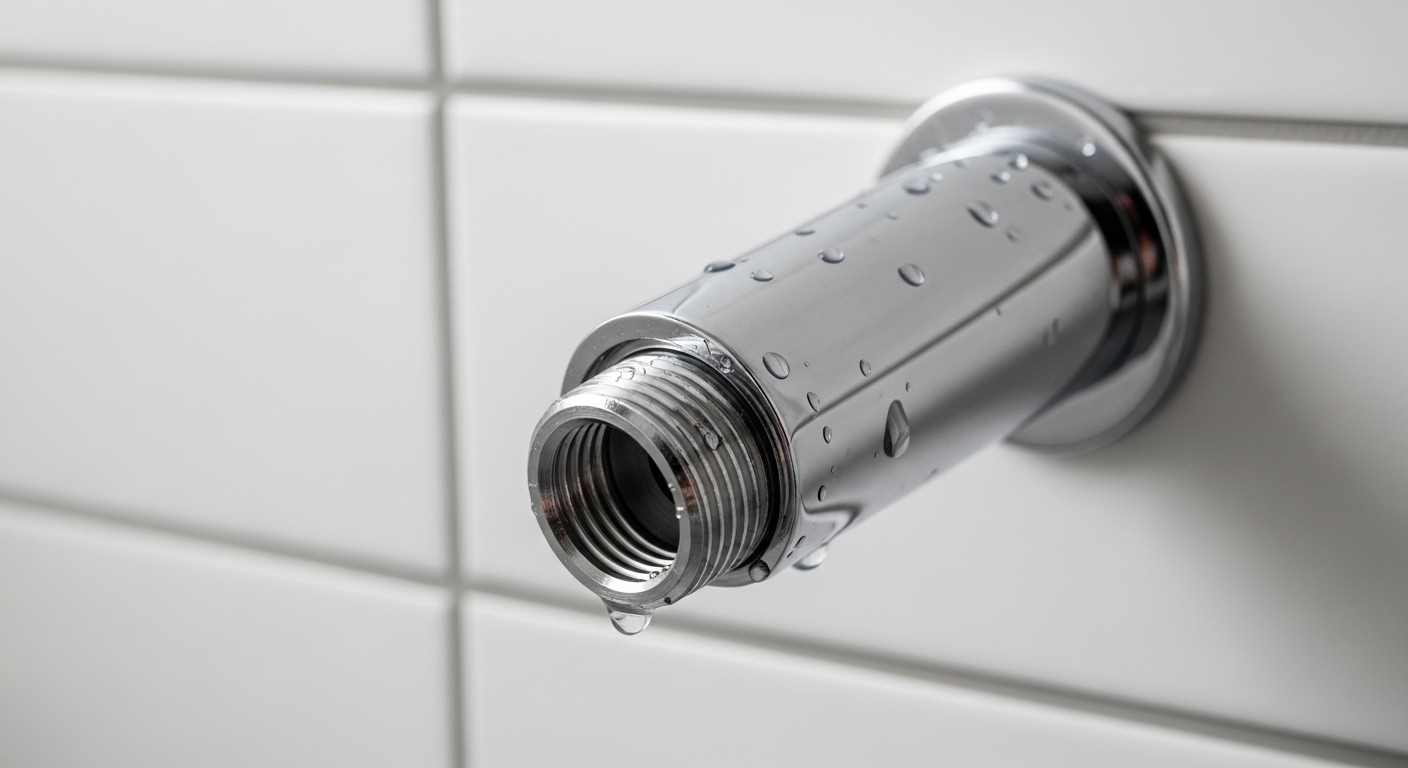
If you’ve been searching how to install shower head bunnings staff put on the shelf — the Methven, Caroma, Mondella, Estilo and GROHE fixed heads, rail showers and handhelds — the good news is that almost all of them use the same universal connection, so the method below works for nearly every one. The shower arm sticking out of your wall (or the hose outlet on a rail) is threaded to a standard 1/2 inch BSP size in Australia, and every mainstream shower head Bunnings stocks is cut to match. That standardisation is exactly why this is a beginner-friendly job: you’re not cutting pipe, soldering, or touching the water main. You’re swapping one screw-on fitting for another.
I’ll walk through the whole process the way I’d explain it to a mate over the fence — what you actually need, the one step everyone skips that causes 90% of leaks, the differences between a fixed head and a rail shower install, and how to handle the awkward cases (stuck old heads, mismatched threads, low water pressure). Let’s get into it.
What Tools and Parts Do You Actually Need to Install a Shower Head?
You need almost nothing — a roll of plumber’s tape, a clean rag, and optionally an adjustable wrench. That’s the honest answer. This is one of the few plumbing jobs where the “tool list” is more about protecting your finish than muscling parts into place.
Here’s the realistic kit:
- Plumber’s (PTFE / thread seal) tape — the white roll, usually under $3. This is the non-negotiable item. It seals the threads so water can’t weep out around the connection.
- A clean cloth or rag — to wipe old tape and gunk off the threads, and to wrap around any tool so you don’t scratch the chrome.
- An adjustable wrench or multi-grip pliers — only if the old head is on tight or you want a firmer final nip. Hand-tight is often enough.
- An old toothbrush + white vinegar — optional, for clearing limescale off the thread and the arm if you live in a hard-water area.
Notice there’s no plumber, no shutting off the water main, and no pipe cutting. Because you’re only ever working downstream of the shower valve, the water stays off simply by leaving the shower tap closed. If you want to be extra cautious you can isolate the bathroom at the stop tap, but for a straight head swap it’s rarely necessary.
How Do You Remove the Old Shower Head Without Damaging the Wall?
Grip the head — not the arm — and turn it counter-clockwise (lefty-loosey) by hand; if it won’t budge, hold the shower arm still with one hand and use a cloth-wrapped wrench on the head with the other. The cardinal rule: never let the shower arm twist inside the wall. If the arm rotates, you can crack the seal on the elbow joint buried behind the tiles, and that turns a 20-minute job into a real plumbing repair.
So always brace the arm. Wrap your free hand (or a second wrench, jaws padded with cloth) around the base of the arm to hold it dead still, then back the old head off. Once it’s loose it’ll spin off freely. Old tape, mineral crust, or a hardened rubber washer might come with it — peel all of that away. You want bare, clean threads before the new head goes on, because old debris is the number-one cause of a connection that drips no matter how tight you crank it.
If the old head is truly seized from years of limescale, soak a rag in warm white vinegar, wrap it around the joint for 15–20 minutes, then try again. The acid softens the calcium deposits that have effectively glued the fitting on. This is the same hard-water buildup that clogs nozzles and chews through fixtures — if your area has aggressive water, it’s worth understanding the bigger picture in our guide to choosing a water filter for hard water and old pipes, because the same minerals that seize your shower head also shorten the life of every fixture in the house.
How Much Plumber’s Tape Do You Wrap on Shower Head Threads?
Wrap 3 to 4 full turns of plumber’s tape around the male thread, in the same direction the head screws on (clockwise as you look at the end of the arm). Too little tape and it leaks; too much and the head won’t seat properly. Three to four wraps is the sweet spot for a 1/2 inch BSP shower fitting.
Here’s the part people get wrong: the direction. If you wrap the tape the wrong way, screwing the head on will just unravel it and you’ve wasted your time. Hold the arm so you’re looking straight at the open thread, and wind the tape clockwise. That way, when the head threads on (also clockwise), it tightens the tape into the grooves instead of peeling it off. Pull the tape taut as you go so it beds into the thread grooves rather than sitting loose, and tear or smooth the end down.
You don’t need a rubber washer and tape on a standard arm-mount fixed head — the tape does the sealing on the threaded joint. Handheld and rail showers are different: those typically seal at the hose with a rubber washer inside the swivel nut, and there you usually don’t use tape (more on that below). Knowing which joint seals with what is the difference between a dry install and a chronic drip.
How Do You Install a Fixed Shower Head vs a Rail Shower or Handheld?
A fixed head screws straight onto the wall arm with tape; a rail shower or handheld involves mounting a rail, connecting a hose with washers, and clipping in the handpiece — more steps, but still no plumber. The connection principle is identical, but the part count differs, so let’s separate them clearly.
| Type | What it connects to | Seal method | Typical install time | Difficulty |
|---|---|---|---|---|
| Fixed wall head | Wall shower arm (1/2″ BSP) | PTFE tape on threads | 15–20 min | Beginner |
| Handheld on existing arm | Wall arm + hose + bracket | Rubber washers in hose nuts | 20–30 min | Beginner |
| Slide rail shower | Wall arm OR wall outlet + screws into tile | Washers + wall plugs/anchors | 45–90 min | Intermediate |
| Twin/combination rail | Wall outlet, fixed head + handheld | Washers + sealed wall plate | 60–120 min | Intermediate |
For a fixed head, follow the remove-clean-tape-tighten sequence above and you’re finished. For a handheld, you screw a wall bracket or elbow on (tape that thread), then attach the hose at both ends — and here the hose has small rubber washers seated inside each swivel nut. Make sure those washers are present and sitting flat; if a hose drips at the nut, 99% of the time the washer is missing, pinched, or doubled up. Hand-tighten the hose nuts plus a gentle nip with a wrench — these brass nuts strip if you gorilla them.
A slide rail shower is the only version that involves drilling. You’ll mark and drill the rail bracket holes into the tile (use a tile/masonry bit and wall plugs), which is where most people slow down. Drilling tile cleanly is its own skill — go slow, mark with tape to stop the bit wandering, and don’t overtighten the screws or you’ll crack the tile. If your wall outlet is a different thread or you’re moving from a fixed arm to a rail, double-check the fitting size before you start, because thread mismatches are common when mixing brands; our explainer on tap hole and thread sizing is a useful primer on why these millimetre differences matter so much for a leak-free fit.
Why Is My New Shower Head Leaking at the Connection?
A leak where the head meets the arm almost always means one of three things: not enough plumber’s tape, tape wound the wrong way, or debris stuck on the threads. The fix is to unscrew it, redo the tape properly, and refit — it’s never a reason to call a plumber.
Run through this checklist in order:
- Check the tape. Back the head off and look. If the tape is shredded or bunched, you wound it the wrong direction. Strip it, clean the thread, and rewrap clockwise with 3–4 firm turns.
- Check for cross-threading. If the head went on crooked or felt gritty going on, you may have started it at an angle. Unscrew fully, line it up square, and thread it on gently by hand first — it should turn easily for the first few rotations.
- Check the washer (handhelds/rails). A drip at a hose nut is a washer problem, not a tape problem. Open the nut, confirm one clean rubber washer is seated flat, and retighten.
- Don’t overtighten as a “fix.” Cranking harder on a leaking joint usually distorts the seal or cracks plastic threads. Snug plus a quarter-turn is the target — if it still weeps, the answer is more or better tape, not more force.
If water is appearing somewhere other than the head connection — dripping from behind the wall plate, or the shower drips long after you turn the tap off — that’s not an install fault, that’s a valve issue, and it predates your new head. A worn cartridge or seat lets water past even when the tap is closed. That’s a separate (still very doable) repair, and we cover it end-to-end in our guide on what to do when a shower faucet valve is leaking.
Will a New Shower Head Fix Low Water Pressure?
Sometimes — a new head can noticeably improve a weak shower if your old one was clogged with limescale or if you choose a head designed to feel strong at low flow. But a shower head can’t create pressure your plumbing doesn’t supply; it can only use what it’s given more cleverly.
Two real scenarios:
- Your old head was clogged. If the spray had gone weak and patchy, mineral buildup was choking the nozzles. A fresh head (or just descaling the old one in vinegar) restores full flow instantly. This is the most common “my pressure came back” story.
- Your home genuinely has low pressure. Here, look for a head marketed as low-pressure-friendly, or one with an air-injection / “rain” design and removable flow restrictor. Some heads have a small restrictor disc you can take out to increase flow — check whether yours does, and whether removing it complies with your local water-efficiency rules (in Australia, look at the WELS star rating).
Speaking of which, that WELS (Water Efficiency Labelling and Standards) rating on the box isn’t just red tape — it tells you the flow rate in litres per minute. A 3-star head around 9 L/min is a sensible balance of feel and water savings; chase a higher flow only if your pressure is genuinely starving the shower. Matching the head to your actual water situation matters more than chasing the most expensive model on the shelf. If you’re upgrading multiple fittings at once, it’s worth thinking about the whole room — our roundup of the best bathroom faucet collections is a good reference for keeping finishes and styles consistent across the shower, basin and bath.
How Do You Choose the Right Shower Head Before You Even Install It?
Pick based on three things in this order: connection compatibility (almost always universal 1/2″ BSP, so rarely an issue), spray feel, and finish durability. The install is easy; choosing a head you’ll still like in three years is the part worth slowing down for.
Think about spray type — a rain head feels luxurious but drops pressure; a concentrated multi-function head feels punchier; a handheld earns its keep if you bathe kids, wash a dog, or clean the enclosure. Then think about the finish. Chrome is bombproof and cheap. Matte black and brushed nickel look fantastic but show water spots more readily and want a quick wipe-down — exactly the kind of hard-water spotting that descaling and a decent water filter help with. Whatever you pick, that universal thread means the actual how to install shower head bunnings process stays the same across the entire range.
Author Note & Why You Can Trust This Guide
This guide was written by the Avamani fixtures team — we design, test and sell bathroom and kitchen faucets, shower heads and bath fixtures, so we install and bench-test these connections every week, not occasionally. Every shower head we recommend is checked against the relevant pressure and water-efficiency standards (including WELS labelling for the Australian market), and the universal 1/2″ BSP fitting we describe is the same standard Bunnings’ mainstream range uses, which is why this method transfers across brands. Avamani products carry manufacturer warranties, and we’d always say: if a fitting arrives with a damaged thread or a missing washer, claim the warranty rather than forcing it — a compromised seal will never seat correctly no matter how good your technique is.
A quick honesty note: we sell fixtures, but nothing in this article needs you to buy ours. The tape-and-tighten method works on whatever head you already have. Good advice first; that’s how we’d want to be treated.
FAQ
Do I need a plumber to install a shower head from Bunnings?
No. Swapping a fixed shower head is explicitly a DIY job — you’re working downstream of the valve, with no pipe cutting and no need to touch the water main. You only need a plumber if you’re relocating the wall outlet, the arm itself is leaking inside the wall, or your state requires a licensed plumber for changes to fixed pipework. A straight head-for-head swap is yours to do.
Which way do I turn the shower head to remove it?
Counter-clockwise (lefty-loosey) when you’re looking at the head from where the water sprays out. Crucially, brace the shower arm with your other hand so it doesn’t twist inside the wall — twisting the arm can damage the hidden elbow joint and cause a real leak behind the tiles.
How much plumber’s tape should I use on a shower head?
Three to four full, taut turns wound clockwise around the male thread, in the same direction the head screws on. That’s enough to seal a 1/2″ BSP joint without bulking it up so much the head won’t seat. Wind it the wrong way and it unravels as you fit the head.
Are all Bunnings shower heads the same size to fit my wall arm?
Effectively yes. The Australian standard is a 1/2 inch BSP connection, and the mainstream shower heads Bunnings stocks are cut to match standard wall arms. The main exception is moving between a fixed arm and a slide-rail or wall-outlet system, where you should confirm the fitting before buying — but for a like-for-like head swap, compatibility is rarely a problem.
My new shower head still leaks after I installed it — what did I do wrong?
Almost always the plumber’s tape: too little, wound the wrong direction, or applied over dirty threads. Unscrew the head, strip the old tape, clean the thread completely, then rewrap 3–4 firm clockwise turns and refit. If it drips at a hose nut instead, it’s a missing or pinched rubber washer, not a tape issue. If water leaks from behind the wall or won’t stop after the tap is off, that’s a valve problem, not an install fault.
Do I need to turn off the water to change a shower head?
Not for a standard head swap — just leave the shower tap closed, since the head sits downstream of the valve. If it makes you more comfortable, isolate the bathroom at the stop tap, but it isn’t required for a simple fixed-head replacement.