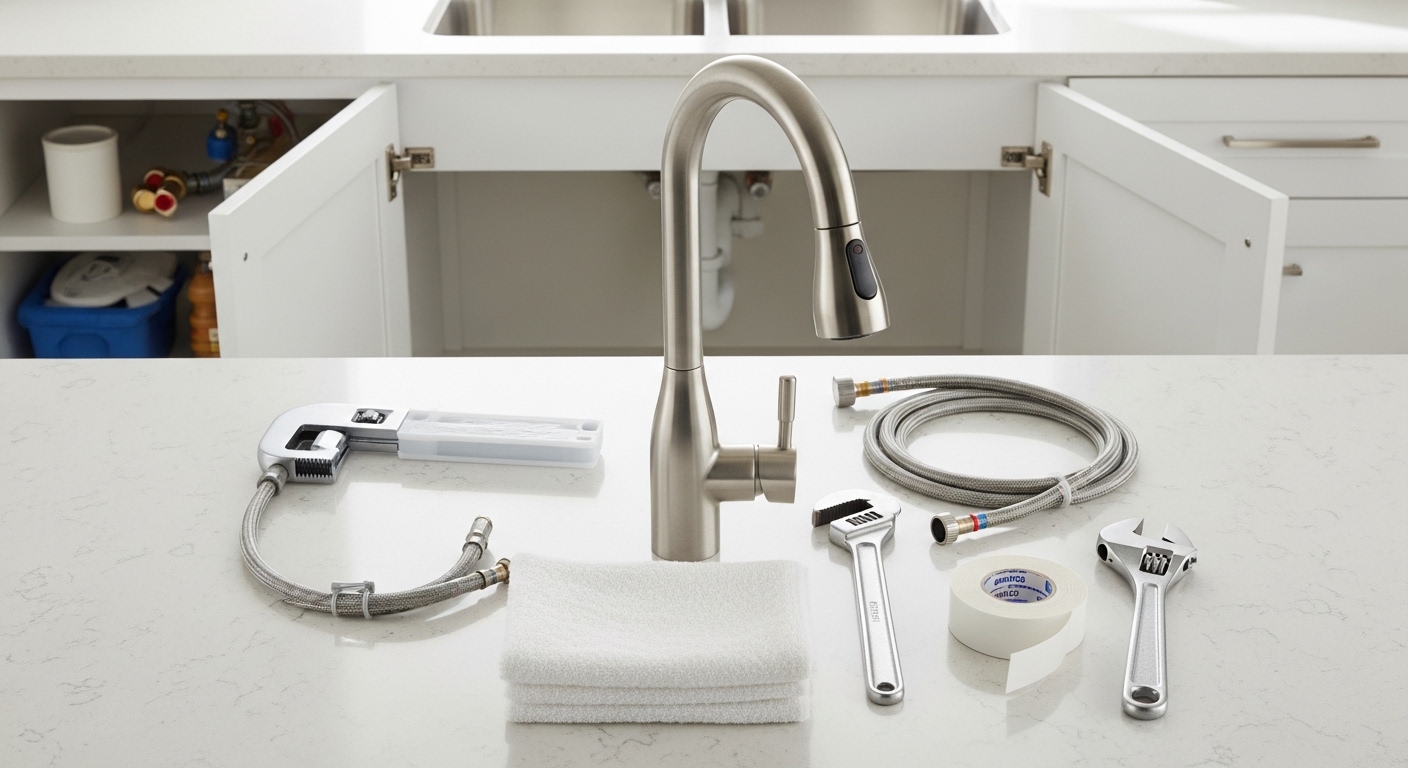
Learning how to set up kitchen faucet hardware is one of the most satisfying DIY plumbing wins you can get in an afternoon — and for the vast majority of standard sinks, you genuinely do not need to pay a plumber $150–$350 to do it. If you can reach under your sink, turn a wrench, and follow a sequence in order, you can install a modern pull-down or single-handle faucet yourself. This guide walks through the exact steps, the tools you need, the mistakes that cause callbacks, and how to know when the job is actually beyond a weekend fix.
Below, we answer the real questions people ask before they start — what tools, how long, one hole or three, what to do about the sprayer hose, and why it still leaks after you turn the water back on.
What tools and parts do I actually need to install a kitchen faucet?
You need a basin wrench, an adjustable wrench, plumber’s tape (PTFE), a bucket and towel, and — depending on your setup — two braided flexible supply lines. That’s the short list, and it covers 90% of home installs.
Here’s why each one matters. The basin wrench is the hero tool: its long shaft and pivoting jaw let you reach the mounting nut way up behind the sink basin where no normal wrench fits. Trying to install a faucet without one is the single biggest reason people give up and call a pro. The adjustable wrench handles the supply-line connections at the shutoff valves. Plumber’s tape seals threaded metal connections so they don’t weep.
- Basin wrench — reaches the mounting nut behind the bowl
- Adjustable wrench (or two) — tightens supply-line couplings
- Plumber’s PTFE tape — for any threaded metal-to-metal joint (not needed on rubber-gasketed braided lines)
- Braided stainless supply lines — buy new ones; the 3/8″ compression to 1/2″ size fits most US valves
- Bucket, towel, and a flashlight or headlamp — the cabinet is dark and there will be residual water
- Silicone sealant or the included gasket — for sealing the faucet base to the deck if no rubber gasket is supplied
Most quality faucets, including Avamani models, ship with the mounting hardware, hoses for the pull-down spray head, and a base gasket already in the box. Always lay everything out and check the parts against the instruction sheet before you touch a wrench — a missing gasket is much easier to solve before the water’s off.
How long does it take to set up a kitchen faucet, and is it a beginner job?
A first-time DIYer should budget 60–90 minutes for a single-hole faucet, and yes, it’s genuinely a beginner-friendly job as long as your shutoff valves work. Someone who’s done it before can knock out a straightforward swap in 30–45 minutes.
The variable that turns a one-hour job into a three-hour ordeal is almost never the new faucet — it’s the old one. Corroded mounting nuts, mineral-fused supply lines, and a cramped cabinet are what eat your afternoon. If your home is more than 15 years old and the faucet has never been replaced, add an hour and a bottle of penetrating oil to your plan. Spray the old nuts, let them sit 15 minutes, and they’ll usually break free.
Do I need a one-hole or three-hole faucet for my sink?
Count the holes in your sink deck (or countertop) first — that number decides everything. Most modern sinks have either one hole for a single-handle faucet or three holes for a faucet plus separate handles or a sprayer, spaced 4 inches or 8 inches apart.
Here’s the part that trips people up: a single-hole faucet can usually be installed on a three-hole sink by adding a deck plate (also called an escutcheon) that covers the two extra holes. The reverse is not true — you can’t put a three-hole widespread faucet on a single-hole sink. So if you’re upgrading to a sleek single-lever pull-down but have an old three-hole sink, just make sure your new faucet includes a deck plate. If you’re working with tight or nonstandard hole spacing, our guide to the widespread faucet on a 4-inch sink breaks down exactly what fits where.
Hole diameter matters too. Standard US kitchen faucet holes are about 1-3/8 inches (35 mm), and most faucet shanks are sized to match. If you’re drilling a new countertop or worried about fit, understanding the tap hole size in millimeters will save you a return trip to the store.
| Faucet Type | Holes Needed | Best For | Install Difficulty |
|---|---|---|---|
| Single-handle pull-down | 1 (deck plate covers 3) | Most modern kitchens | Easy |
| Two-handle centerset | 3 (4″ spread) | Traditional / budget sinks | Easy–Moderate |
| Widespread two-handle | 3 (8″+ spread) | Large or custom sinks | Moderate |
| Bridge faucet | 2–3 | Farmhouse / vintage look | Moderate–Hard |
What are the exact steps to set up a kitchen faucet?
Work in this order — the sequence is what keeps you dry and leak-free. The whole point of learning how to set up kitchen faucet hardware correctly is doing each step before the one that depends on it, especially connecting hoses before you fully tighten the faucet down when access is tight.
- Shut off the water. Turn both the hot and cold shutoff valves under the sink clockwise until they stop. Open the old faucet to release pressure and confirm the water is actually off.
- Disconnect the supply lines. Place a towel and bucket underneath. Use an adjustable wrench to loosen the supply-line nuts at the valves. Expect a little residual water.
- Remove the old faucet. Reach up with the basin wrench, loosen the mounting nut(s), and lift the old faucet out from the top. Scrape off old gunk or sealant from the deck.
- Prep the new faucet. If it uses a deck plate, set the gasket and plate on the sink first. Thread the pull-down hose or supply tubes down through the faucet body per the instructions.
- Drop it in. Feed the faucet’s tailpieces and hoses down through the sink hole. Have a helper hold it straight and centered, or use painter’s tape to keep it aligned.
- Secure from below. Thread the mounting nut up onto the shank and tighten with the basin wrench until the faucet is snug and won’t rotate. Don’t overtighten and crack anything.
- Connect the supply lines. Attach the braided lines from the shutoff valves to the faucet inlets — hot to hot (left), cold to cold (right). Hand-tighten, then a quarter-turn with the wrench. Rubber-gasketed lines don’t need tape.
- Attach the sprayer hose and weight. For a pull-down or pull-out, connect the spray hose to the faucet outlet (usually a quick-connect click) and clip the counterweight onto the hose so the head retracts.
- Turn the water back on slowly and check every joint.
Why is my kitchen faucet leaking after I installed it?
A brand-new faucet that leaks almost always has one of three causes: an under-tightened supply connection, a missing or pinched gasket at the base, or a cross-threaded coupling. The good news is all three are quick fixes and none mean your faucet is defective.
Turn the water back on slowly and watch. If water beads at a supply-line nut, snug it another eighth-turn — but stop the moment it stops dripping, because overtightening crushes the gasket and makes leaks worse. If water pools on top of the sink around the base, your deck gasket is off-center or you skipped the bead of silicone. If the faucet handle itself feels loose or wobbles, that’s a mounting or handle-set-screw issue, not a leak — our walkthrough on a loose kitchen faucet handle covers the exact fix, and it applies to most brands.
One overlooked culprit: debris in the lines. After any install, remove the aerator, run the faucet for 15 seconds to flush out sediment loosened during the work, then screw the aerator back on. This prevents the “weak flow” complaint that people mistake for a bad faucet.
Can I install a pull-down or filtered faucet the same way?
Yes — a pull-down faucet installs almost identically to a standard single-hole faucet, with two extra steps: routing the spray hose and clipping on the counterweight. A filtered faucet adds one more connection for the filter line, but the deck installation is the same.
Pull-down and pull-out models are the most popular kitchen upgrade right now for good reason — the flexible hose makes rinsing pots and cleaning the sink far easier. If you’re weighing options, our honest look at the Grohe pull-out kitchen tap shows what to expect from a premium hose-and-weight system. For homes with hard water or taste concerns, a built-in filter faucet is worth considering; the best white kitchen tap with filter guide explains how those extra water lines connect without complicating the install.
The one thing to double-check on any pull-down: make sure the counterweight is clipped at the right point on the hose. Too high and the spray head won’t retract fully; too low and it dangles inside the cabinet. Test the retraction a few times before you declare victory.
When should I stop and call a plumber instead?
Call a plumber if your shutoff valves don’t work, if you have galvanized or corroded pipes, or if you need to add valves or move plumbing. Those are the situations where a DIY faucet swap turns into an emergency.
Specifically, stop and get help if: the under-sink shutoff valves won’t fully close (you’d have to kill water to the whole house and race the clock), the valve handles snap or leak when you turn them, your supply pipes are old galvanized steel that flakes when disturbed, or there are simply no shutoff valves at all. Adding quarter-turn shutoff valves is a job many DIYers can do, but it involves cutting into live supply lines — a reasonable line to draw for calling a pro. A faucet swap is beginner-friendly; re-plumbing under the sink is not.
FAQ
Do I need plumber’s tape on a kitchen faucet install?
Only on threaded metal-to-metal connections — for example, where a metal supply line threads onto a metal valve. Modern braided supply lines use a rubber gasket (a small cone-shaped washer) inside the nut and should not get tape; the tape can actually prevent the gasket from seating and cause a leak. When in doubt, tape metal threads, leave gasketed connections bare.
Can I use my old supply lines with a new faucet?
You can, but you shouldn’t. New braided stainless supply lines cost only a few dollars and are the single cheapest insurance against a slow leak that ruins your cabinet. Old lines get stiff, and the gaskets compress permanently, so reusing them often leads to a weep you won’t notice until there’s water damage. Buy new ones and match the length and end fittings to your setup.
How do I know if my faucet holes will fit the new faucet?
Measure two things: the number of holes and the diameter of each. Standard US kitchen sink holes are 1-3/8 inches (about 35 mm), which fits nearly every faucet shank. Also measure the spacing between holes — 4 inches (centerset) or 8 inches (widespread) — if you’re buying a multi-hole faucet. A single-hole faucet with a deck plate fits almost any 1, 2, or 3-hole configuration.
Why is my water pressure low after installing the new faucet?
Nine times out of ten it’s the aerator clogged with sediment that got knocked loose during the install. Unscrew the aerator at the tip of the spout, rinse out the mesh screen, run the faucet briefly to flush the lines, then reinstall it. Also confirm both shutoff valves are turned fully open — a half-open valve throttles flow.
Is it safe to install a kitchen faucet myself if I’ve never done plumbing?
Yes, provided your shutoff valves work and you follow the steps in order. A kitchen faucet swap is one of the lowest-risk plumbing jobs because you’re working with the water off and everything is accessible from above and below the sink. The worst realistic outcome of a mistake is a drip you tighten away — not a flood — as long as you turn the water back on slowly and watch the connections.
What’s the difference between installing a kitchen faucet and a shower head?
A kitchen faucet connects to hot and cold supply lines under the sink and mounts through the deck, while a shower head simply threads onto an existing shower arm — no supply-line work at all. The shower head is genuinely a 5-minute job; see our shower head installation guide if that’s your next project.
A note on expertise and standards
This guide was written by the Avamani product and installation team, drawing on hands-on testing of the pull-down, single-hole, and widespread faucets we sell. Avamani has specialized in kitchen and bathroom fixtures since our founding, and every faucet we ship is tested to standard cartridge cycle-life and flow benchmarks before it reaches you. Our kitchen faucets meet US flow-rate regulations (2.2 gpm max) and ceramic-disc cartridges are rated for hundreds of thousands of open-close cycles. When you buy from Avamani, the faucet is backed by a manufacturer warranty that covers the cartridge and finish — keep your receipt and installation date, because warranty claims are simplest when you can show the faucet was installed to the included instructions. If your install uncovers corroded shutoff valves or nonstandard plumbing, we still recommend a licensed plumber for that portion of the work.
Once your faucet is in and leak-free, run it for a full minute, open the cabinet, and re-check every joint one last time before you load your cleaning supplies back under the sink. That final check is what separates a clean install from a next-week surprise.